Super Bright Bike Water Bottle Light
This article was last edited over 3 years ago. Information here may no longer be accurate. Please proceed with caution, and feel free to contact me.
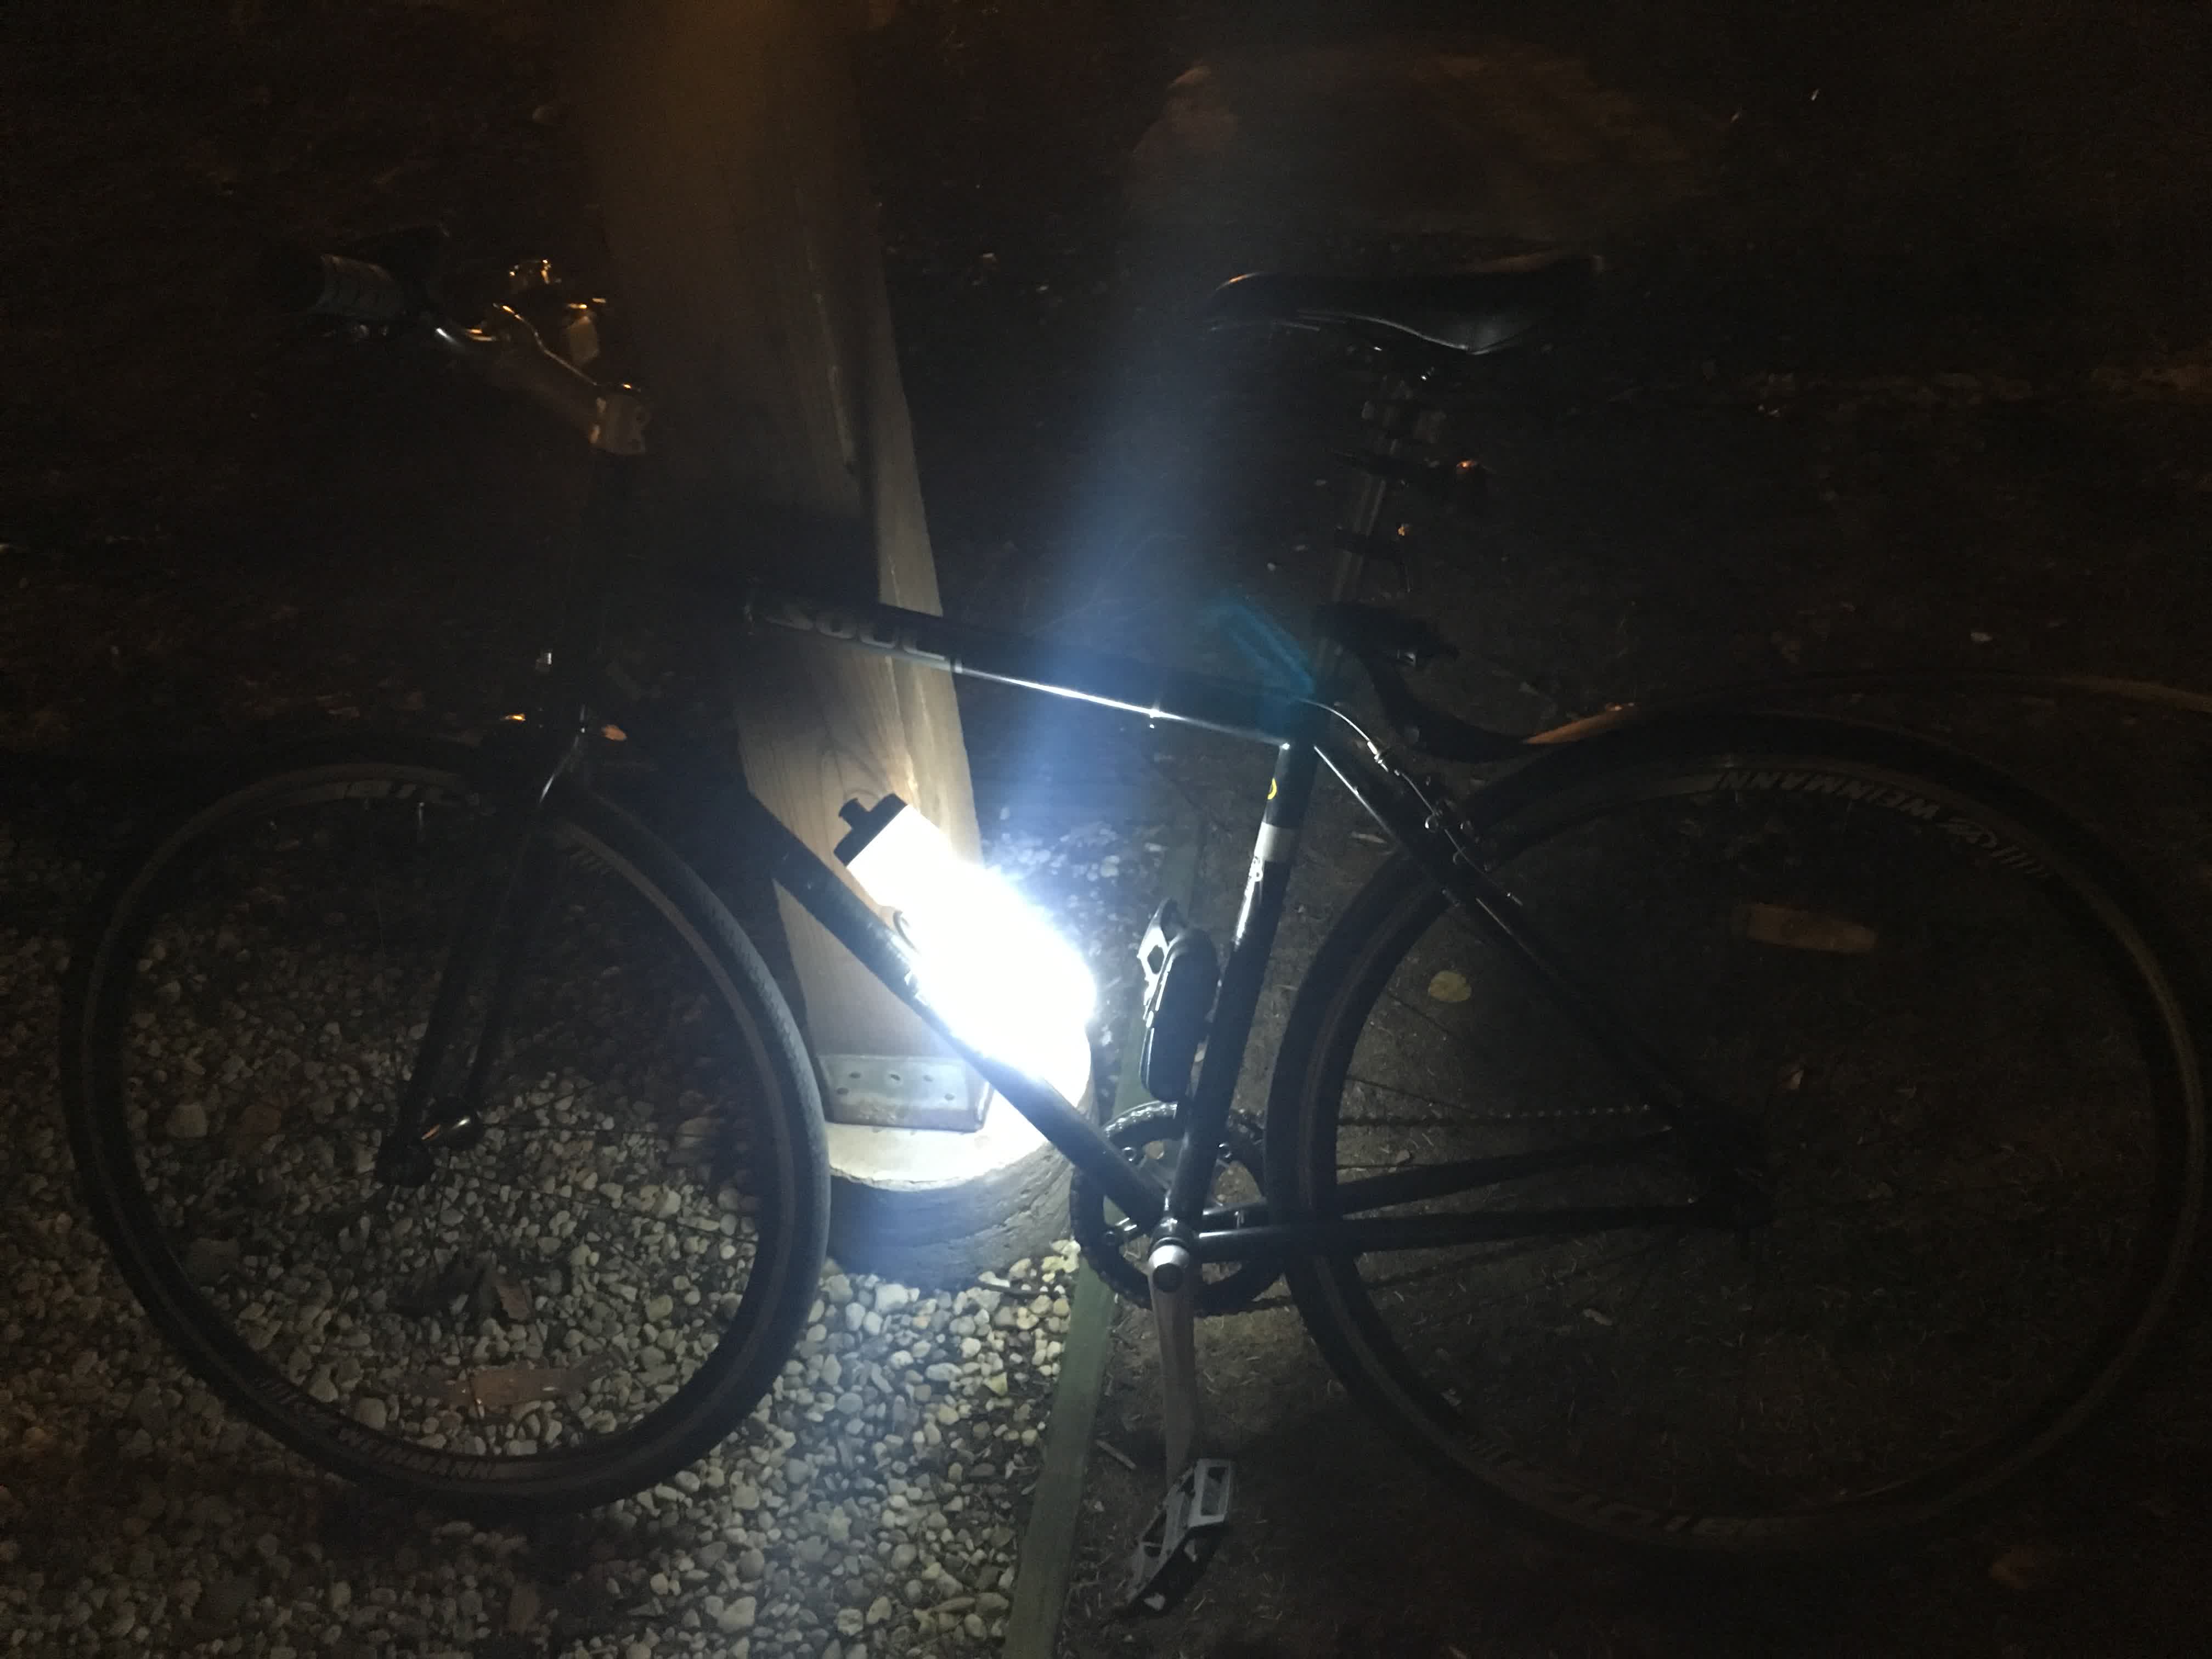
It’s dark out when I bike home from work around 5pm in winter. I want to be as visible as possible to make sure drivers, pedestrians, and other cyclists see me for their safety and mine. The easiest way to do that is with some lights.
I already have a bright headlight, two bright tail lights, a spare (emergency) light for front or back as needed, a helmet light that blinks front and rear, and spare batteries as well a USB power bank. I’d like to think that between all these I’m well covered. The only area I felt I was lacking was in side profile visibility.
Until now…
My inspiration came from a post on TheChainLink forums referencing the Planet Bike Bottle Blinky. I loved the idea of a water bottle mounted light, and that’s what I thought it was based on the name. In reality, the Bottle Blinky is a side-view/profile-visible light that mounts under the water bottle frame. It’s not what I imagined, but it’s still really bright and convenient and I recommend you check it out!
The idea of side visible lights led me down a road looking at all sorts of powered spoke lights and frame LEDs. Most required a separate power pack that sat in the spokes or mounted to the frame, or watch batteries that would need replacing every 24 hours of use. I don’t like the idea of wires and batteries sitting in my wheels, and I also don’t like the idea of wasting lots of disposable batteries, so I ended up avoiding those options.
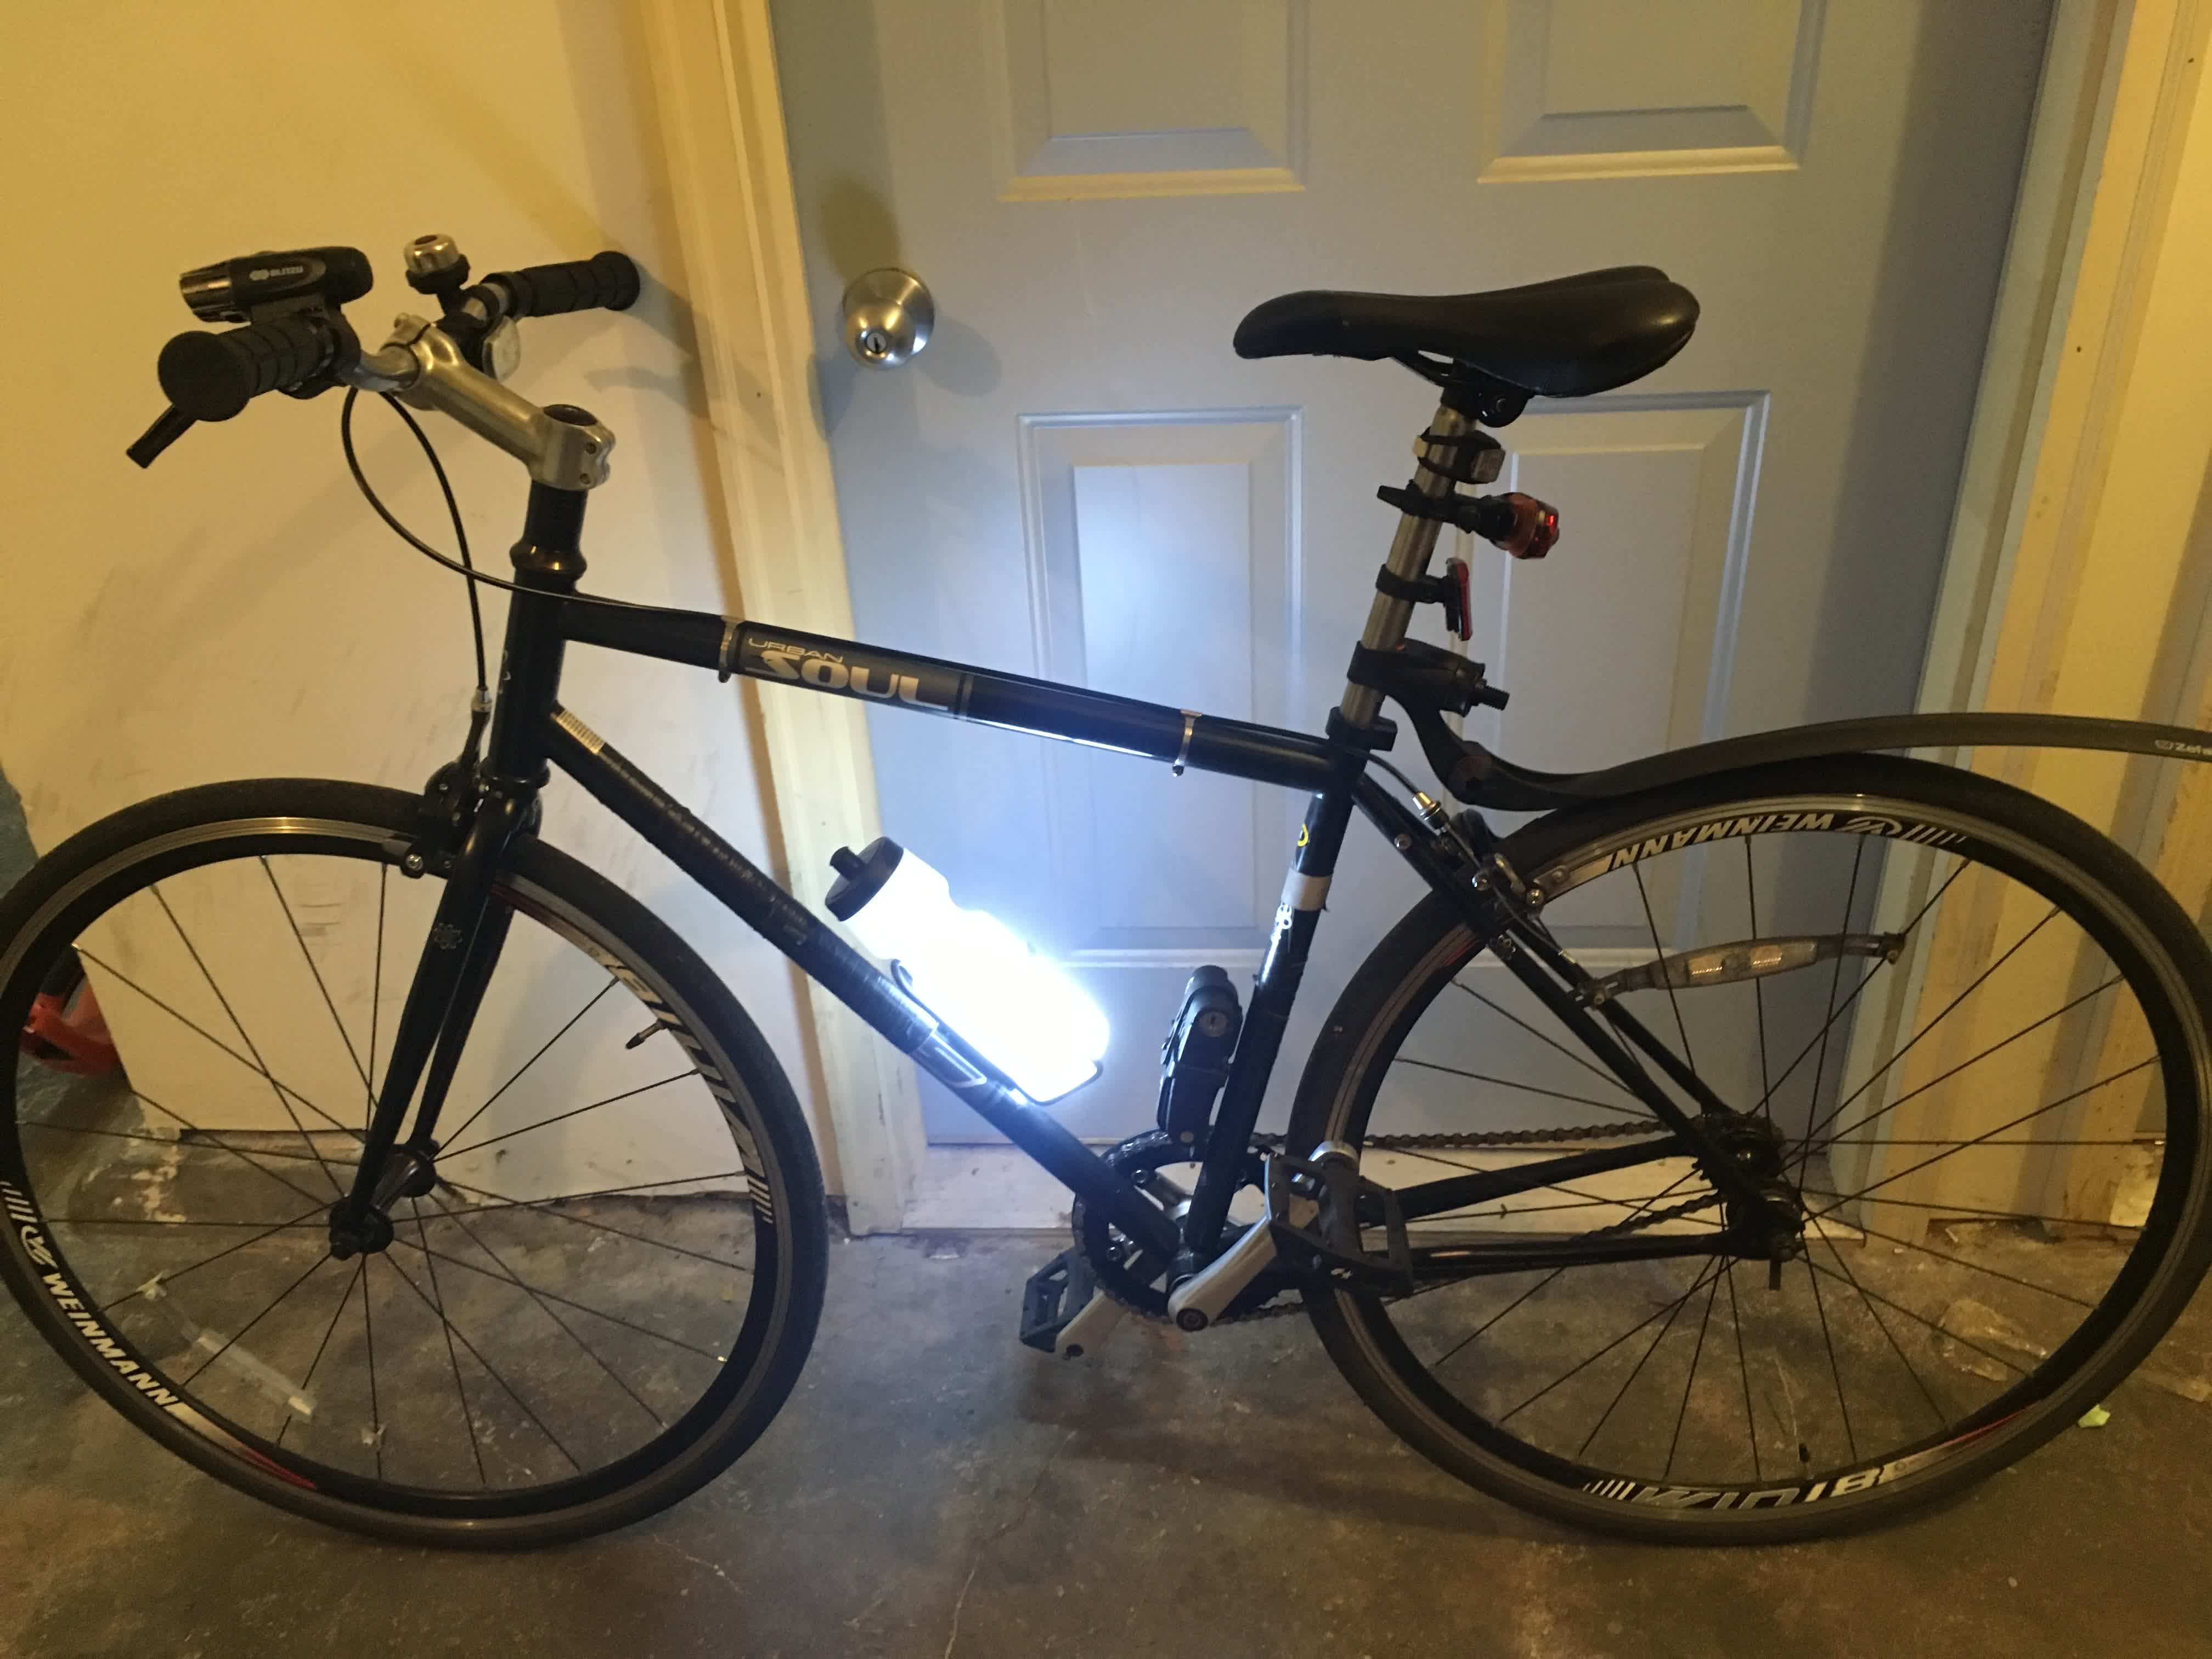
The Bottle Blinky seemed like the ideal option. In fact, I recommend most people simply buy a Bottle Blinky as it’s smaller cheaper and easier than my project here, but I decided to make my own “bottle” light because I wanted something a bit brighter, and a water bottle seemed like a simple enclosure to house the battery and components necessary for that sort of light. I also wanted a simple electronics project.
Although I think the Bottle Blinky really is the better option, feel free to keep reading to see how I assembled my light and be sure to read all the caveats below.
Parts
- Anker PowerCore 5000, Ultra-Compact 5000mAh External Battery
- Flexible Silicone Neon-Like LED Strip - 1 Meter - Cold White
- Female DC Power adapter - 2.1mm jack to screw terminal block
- USB to 2.1mm DC Booster Cable - 12V
I didn’t need to do any soldering. This was simply a matter of screwing and plugging things together.
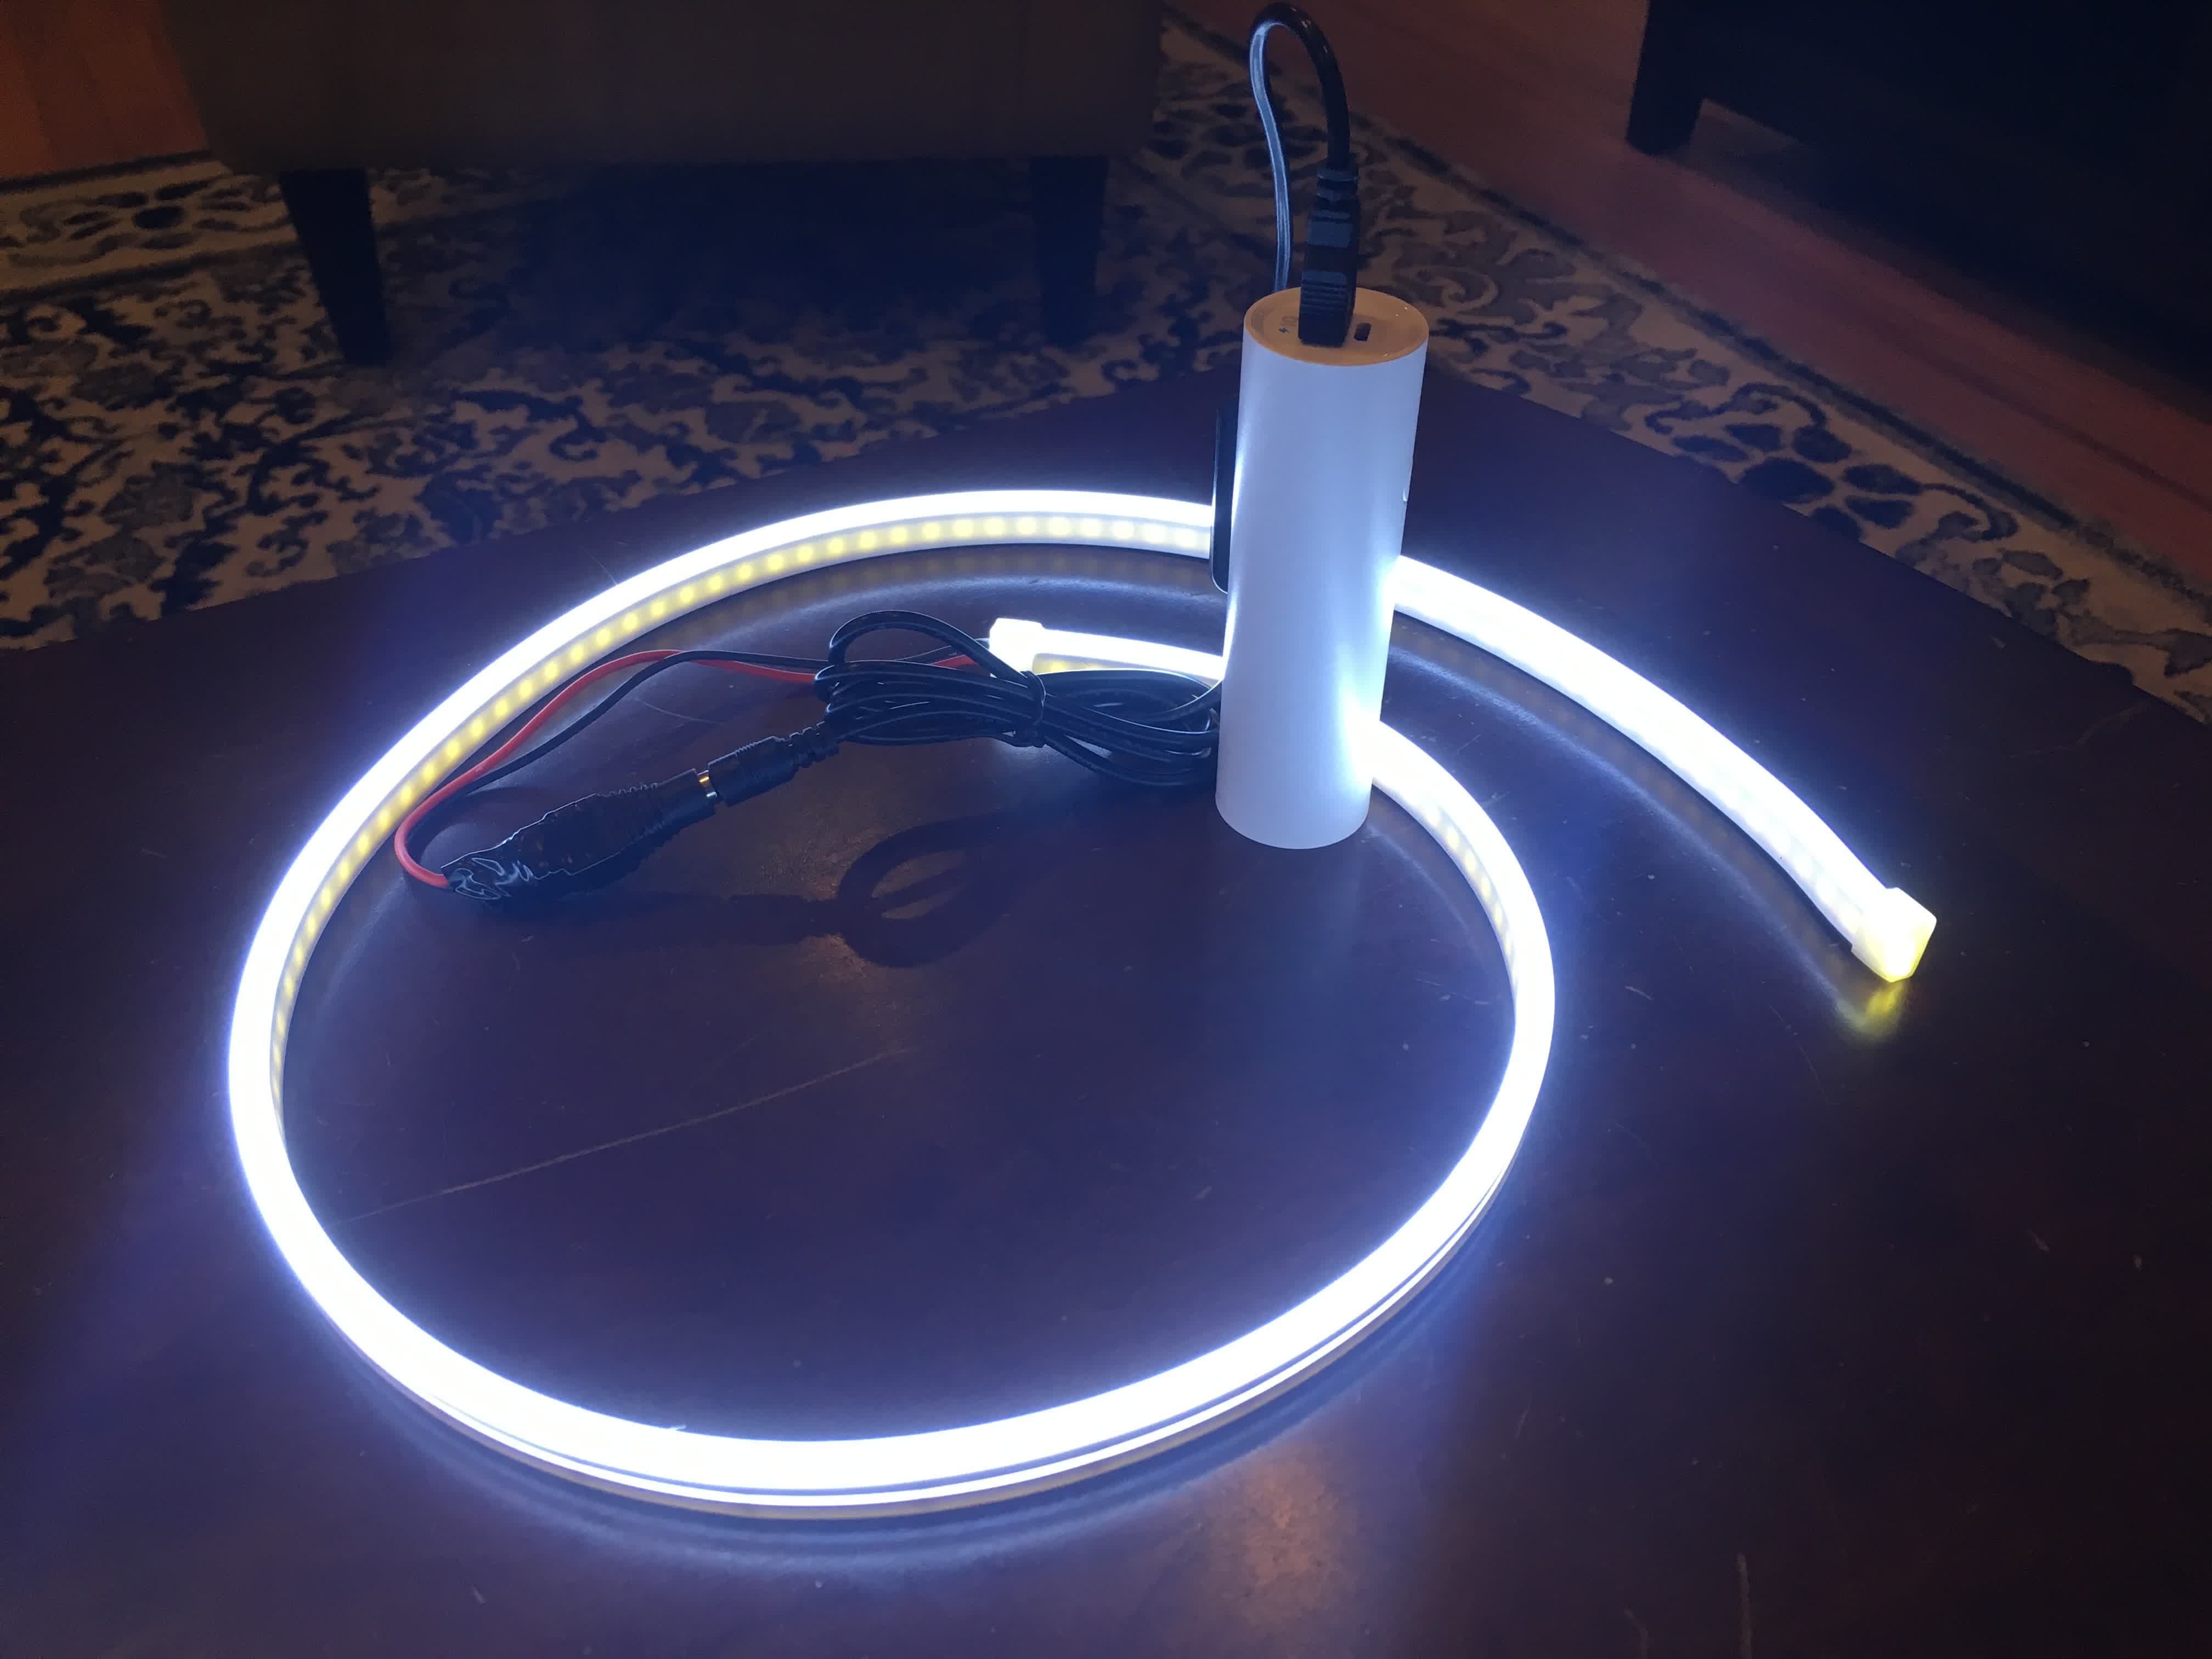
The DC Booster cable converts the 5V battery power to 12V for the LED light strip. It’s also possible to power the LED strip off 9V and it will work just as well, but a little dimmer. A 9V battery would have been much simpler, but I did not want to burn through 9V batteries, and a rechargeable 9V battery just for this seemed silly. I figured a larger USB battery bank would give me more life between rides.
Adafruit also sells a 5V to 9V DC Booster cable I could’ve used instead, but I figured I might as well go for full brightness with 12V.
The result is a simple self-contained and very bright water bottle light.
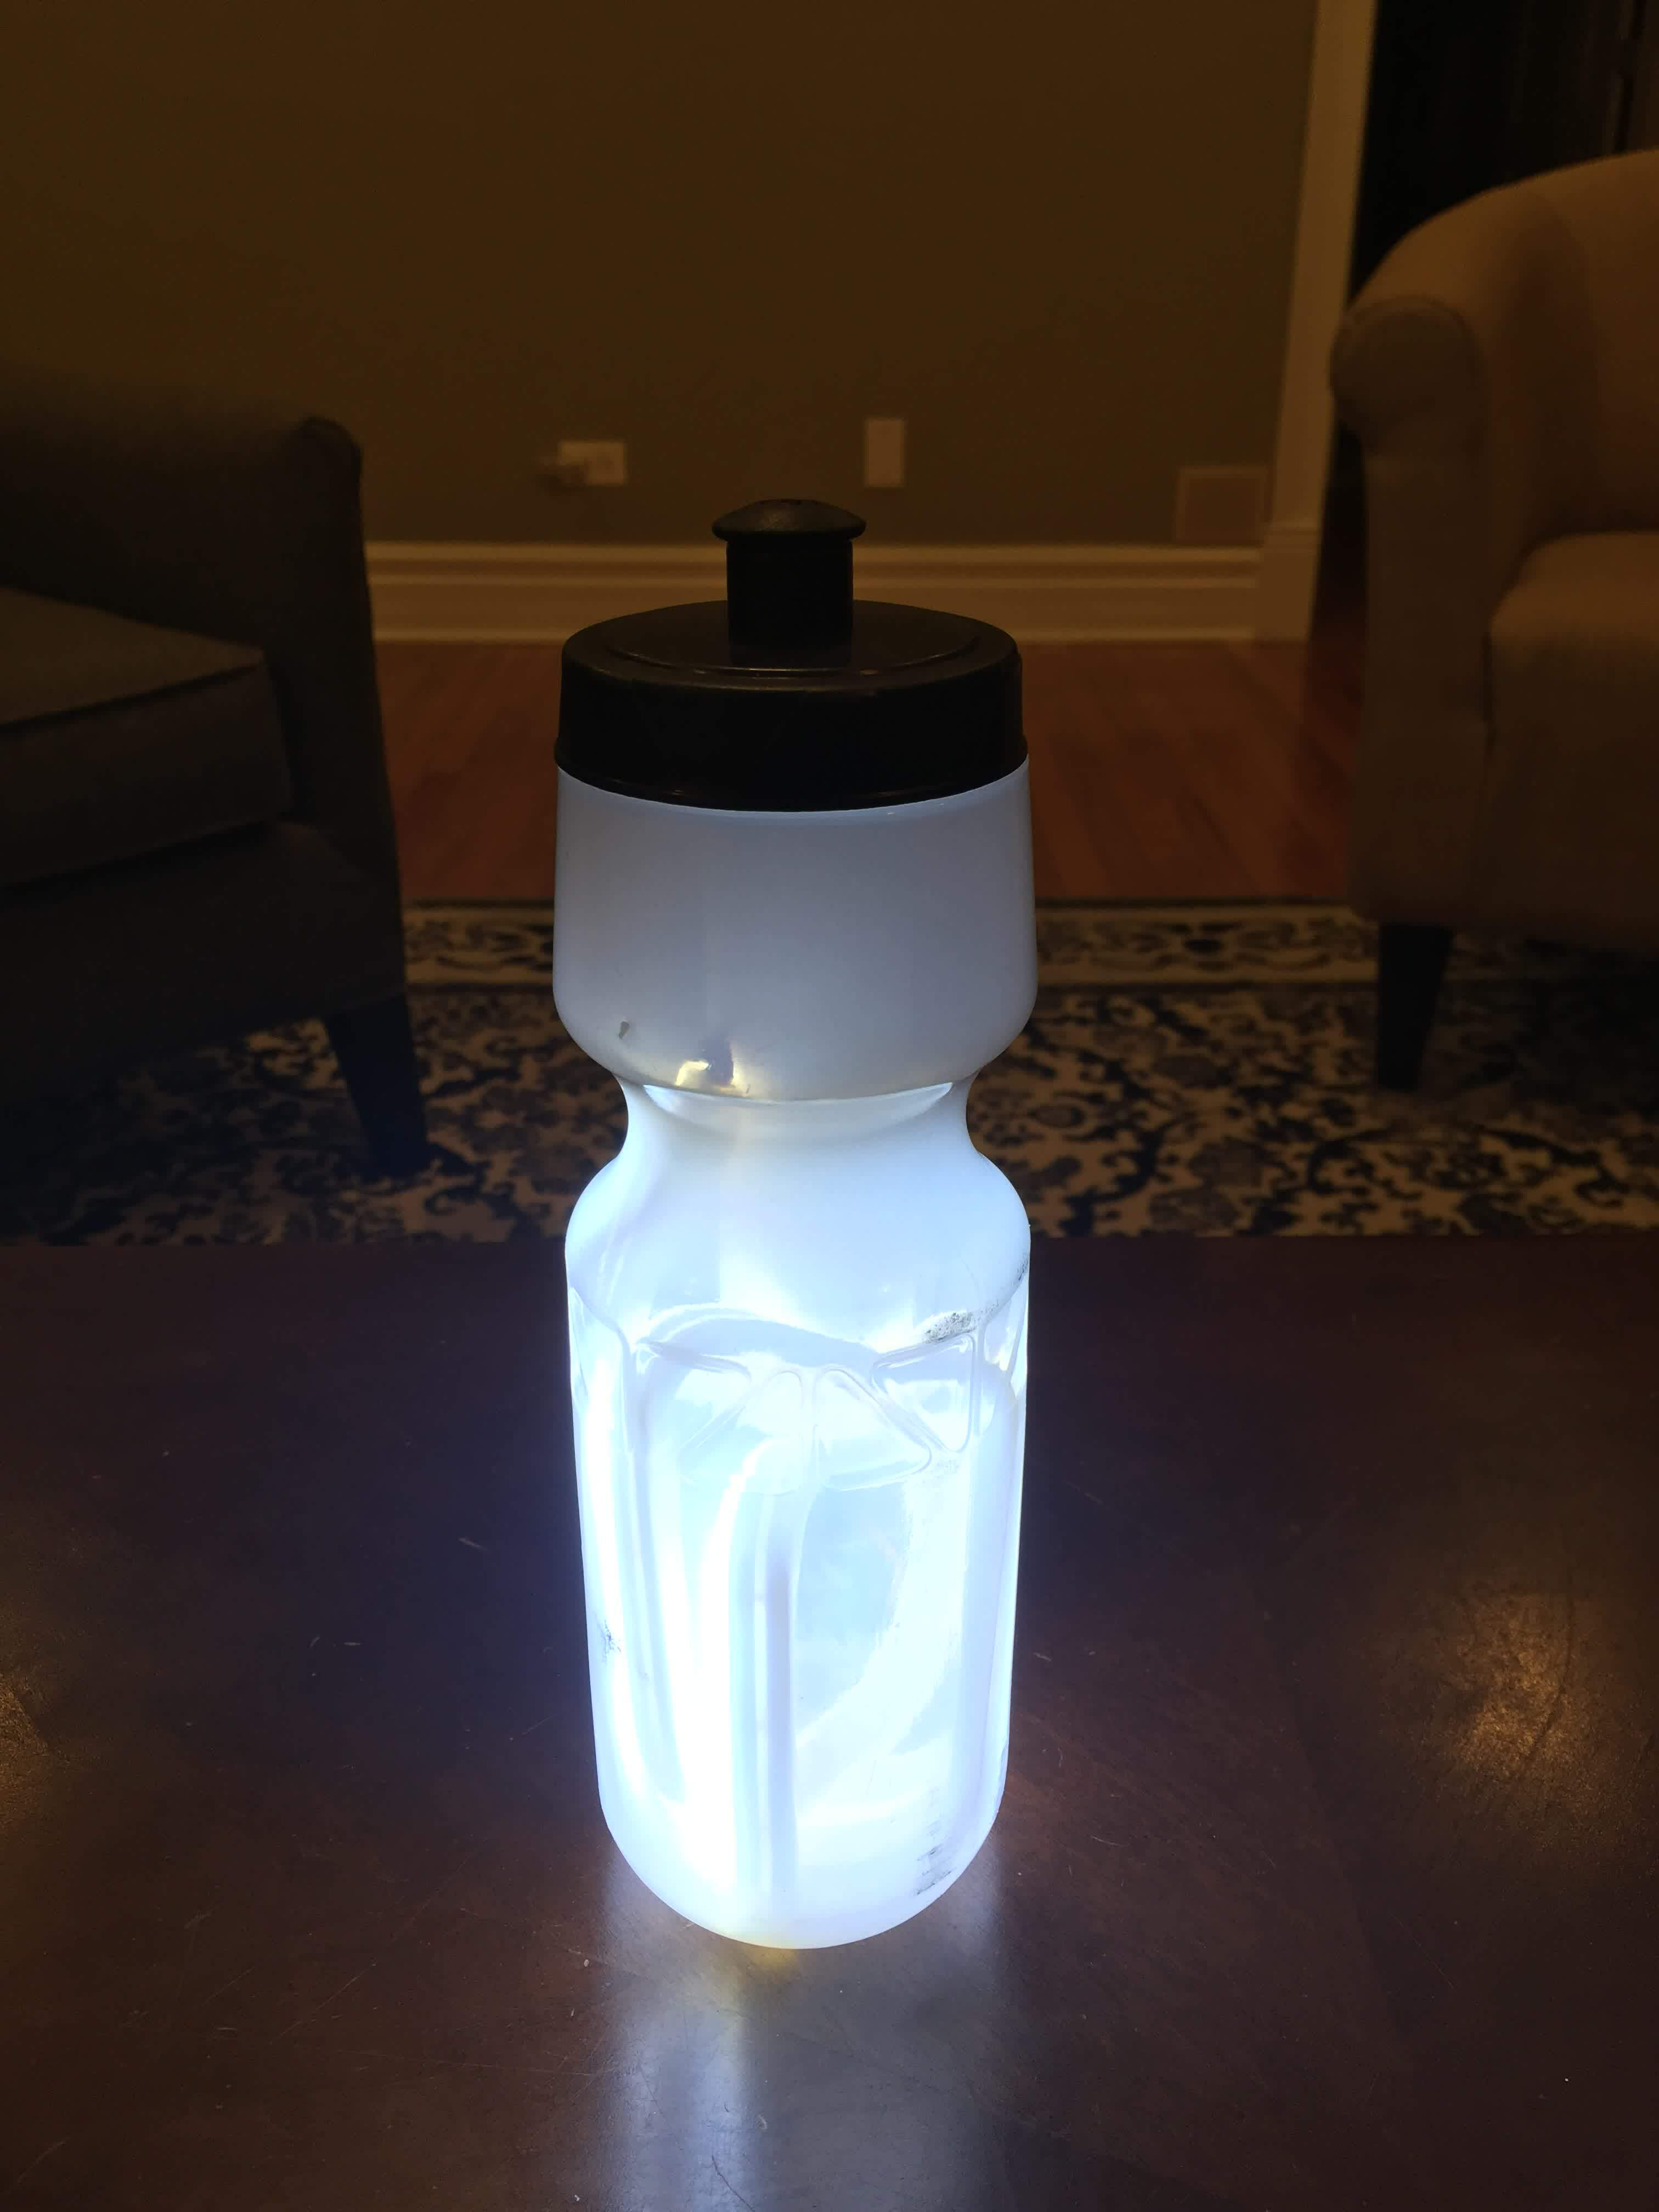
If I was a better Maker I would shorten the wires for the various connections. They take up a lot of room in the bottle as is. Adding a switch would be nice as well. Right now I have to remove the cap and unplug the USB cable from the battery pack. Not a huge pain overall.
Another downfall of this build is that I’ve taken up my entire water bottle mount with something that does not hold water! Not a problem for me in winter, but I’ll be missing that come summer.
I should also point out that the LED light strip gets rather warm, especially after it’s been in the bottle for a while. I’m not sure I’d say it gets hot, but it gets warm enough that I wouldn’t leave this unattended at room temperature.
Thankfully, I’m riding in sub-freezing temperatures so overheating hasn’t been an issue, but I have a feeling this build might burn out on hot summer nights.