Using GRIP for FRC Vision Detection
This article was last edited over 3 years ago. Information here may no longer be accurate. Please proceed with caution, and feel free to contact me.
This guide covers the basics for using GRIP and generating vison code. This is not a complete guide for using that vision code with a co-processor or robot. Using GRIP is only one step of a larger series of steps for vision programming. See the Vision Processing FRC guide for a broader explanation.
To use GRIP you will need a Windows, macOS, or Linux computer. For this guide I am assuming a USB or integrated web camera is connected to your computer or that you have access to an HTTP (web) accessible camera.
What is GRIP?
GRIP is a tool used to help generate vision analysis code. It is a shortcut to prevent manually writing vision detection and analysis code. GRIP is not strictly necessary, but will probably make your life much easier. I do not know how to write object detection code from scratch, and GRIP did in a few minutes what would have probably taken me days otherwise.
FRC’s ‘Vision with GRIP’ guide as well as their 2020 Hour of Code with FIRST (part of the RSN Spring Conference, Presented by WPI series) are better guides to GRIP than this article. You should read/watch them to get a deeper understanding.Get GRIP
Download the latest stable version of
GRIP
(v1.5.2 at time of writing) to your computer. Under
Assets download the exe,
dmg, or deb to your developer machine
depending on which operating system you use. Install GRIP once
downloaded and run it.
Select a Camera
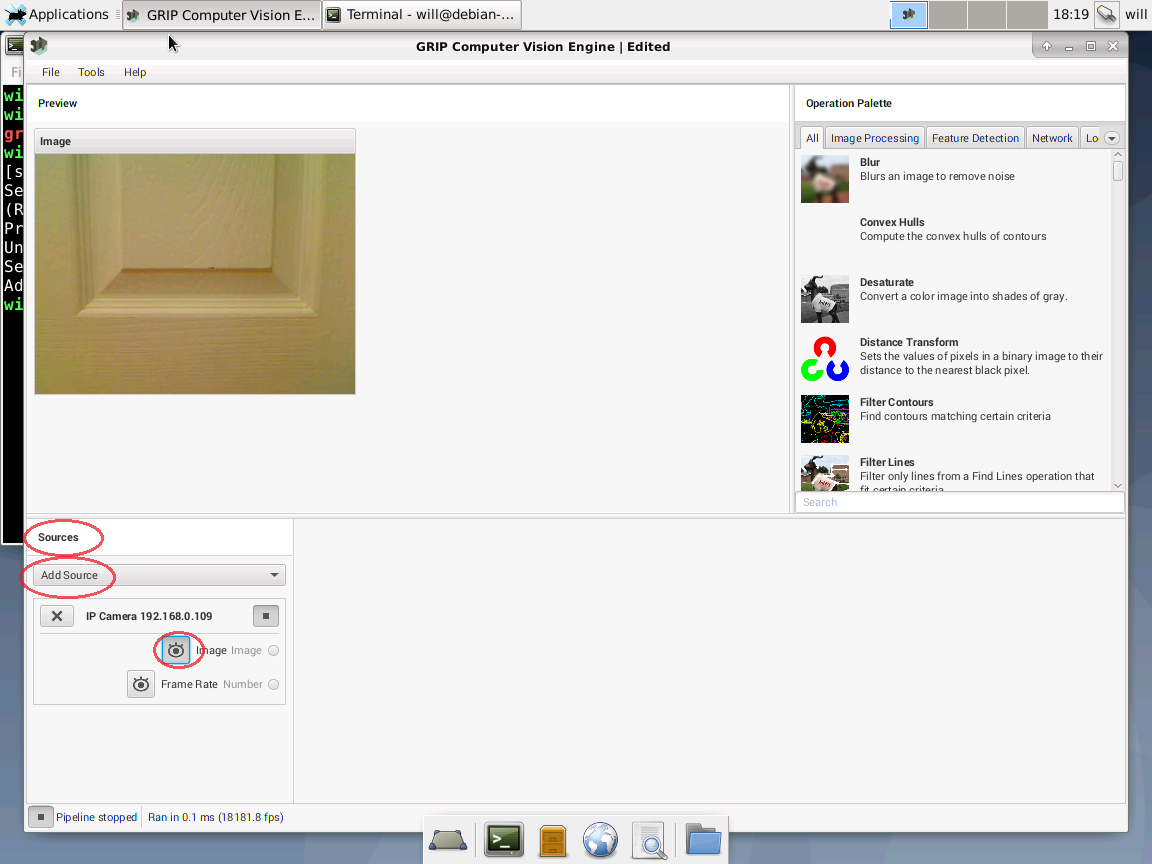
In GRIP, click Add Source under Sources.
We can select a camera from a variety of sources.
If you have a USB or integrated camera then select
Webcam. This is the simplest way to get started.
If you have a web-accessible camera then select
IP Camera. In the box that appears type the URL of
the camera. For example, I have a streaming webcam on my network
at http://192.168.0.109:8087/camera.mjpg.
Regardless of the type of camera, the camera should appear as a
source under Sources after it is added.
Click the “open eye” icon next to
Image to see a preview from the camera in GRIP.
Detectable Objects
I am not an expert on vision recognition principles, so I’m winging things a bit here.
At the FIRST Robotics Competition the game pieces are often very brightly colored and reflective. There is a good reason for this. High contrast bright items are easier to detect.
See the Target Info and Retroreflection article from FRC for a better explanation.
A bright orange or yellow ball, or a reflective piece of tape, are easier to identify on an FRC playing field. Image detection works by teaching a program how the target item(s) you want detected are unique and identifiable. Our goal is to train GRIP (and eventually our robot code) how to pick out our desired item among other items.
For this guide I will use a tennis ball as an example.
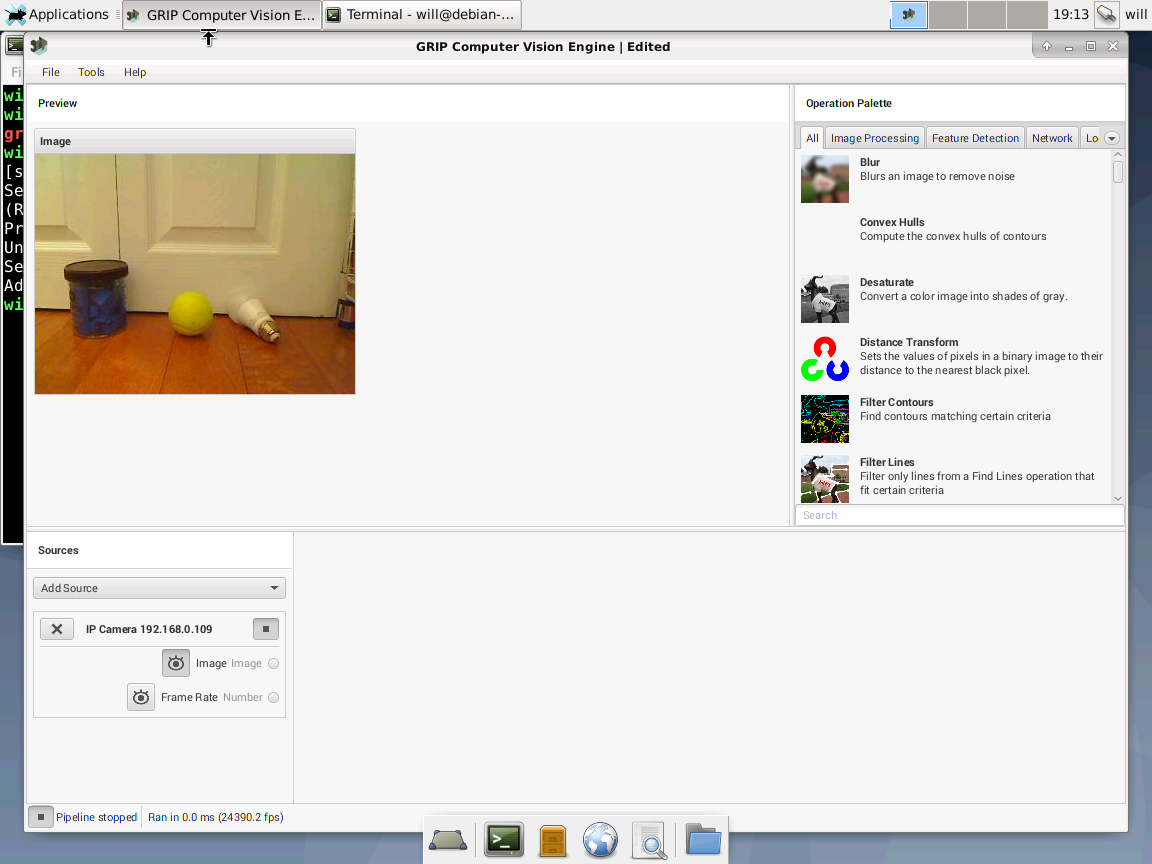
Pretend this tennis ball is a game piece that we want a robot to “see” and drive towards. After we train it, GRIP will be able to identify where that ball is on screen and will ignore the background and other objects.
Add One Filter
In the right hand column click Blur to add a blur
filter step to the processing pipeline. Click the radio button
next to Image under the Sources section
and drag it over to Input in the
Blur step. There should now be a curvy line
connecting the two steps.
For my example I changed the Blur
Radius to 3 to help smooth the image and
make it simpler for other filters to detect whole objects.
We’ll add other filters in a moment.
Click the “open eye” icon next to
Output to see a blurred preview from the camera in
GRIP.
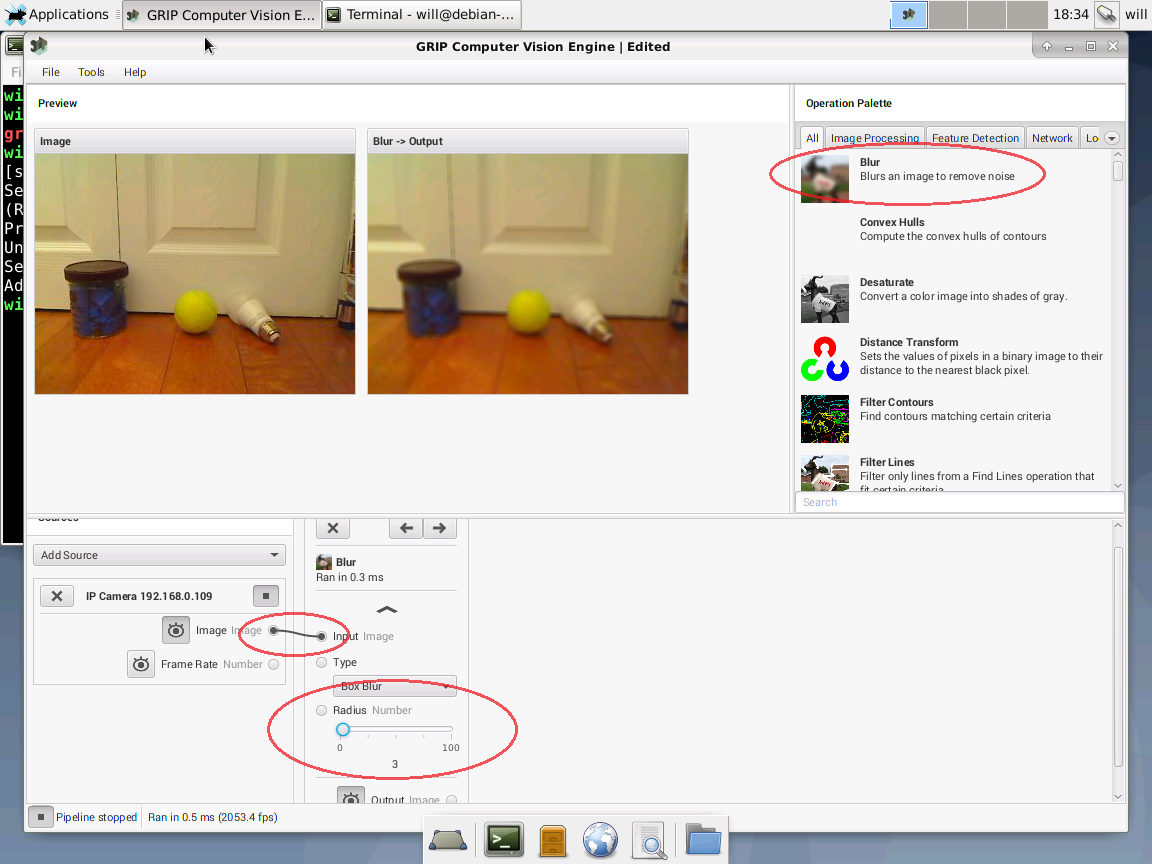
This is the basic process for taking a source input feed from a camera, and sending it down a “pipeline” for multiple filters to act on it.
Add Additional Filters
We can repeat this same sort of behavior to chain together several processing steps.
In the right hand column click HSV Threshold,
Find Contours, and Filter Contours
in that order to add those steps to the pipeline.
Drag the Output of Blur to the
Input of HSV Threshold. Drag the
Output of HSV Threshold to the
Input of Find Contours. Drag the
Contours of Find Contours to the
Contours of Filter Contours.
Now we have a pipeline connecting like so.
[======]   > [====]   > [===]   > [====]   > [======]
|Source|  >  |Blur|  >  |HSV|  >  |Find|  >  |Filter|
[======] >   [====] >   [===] >   [====] >   [======]
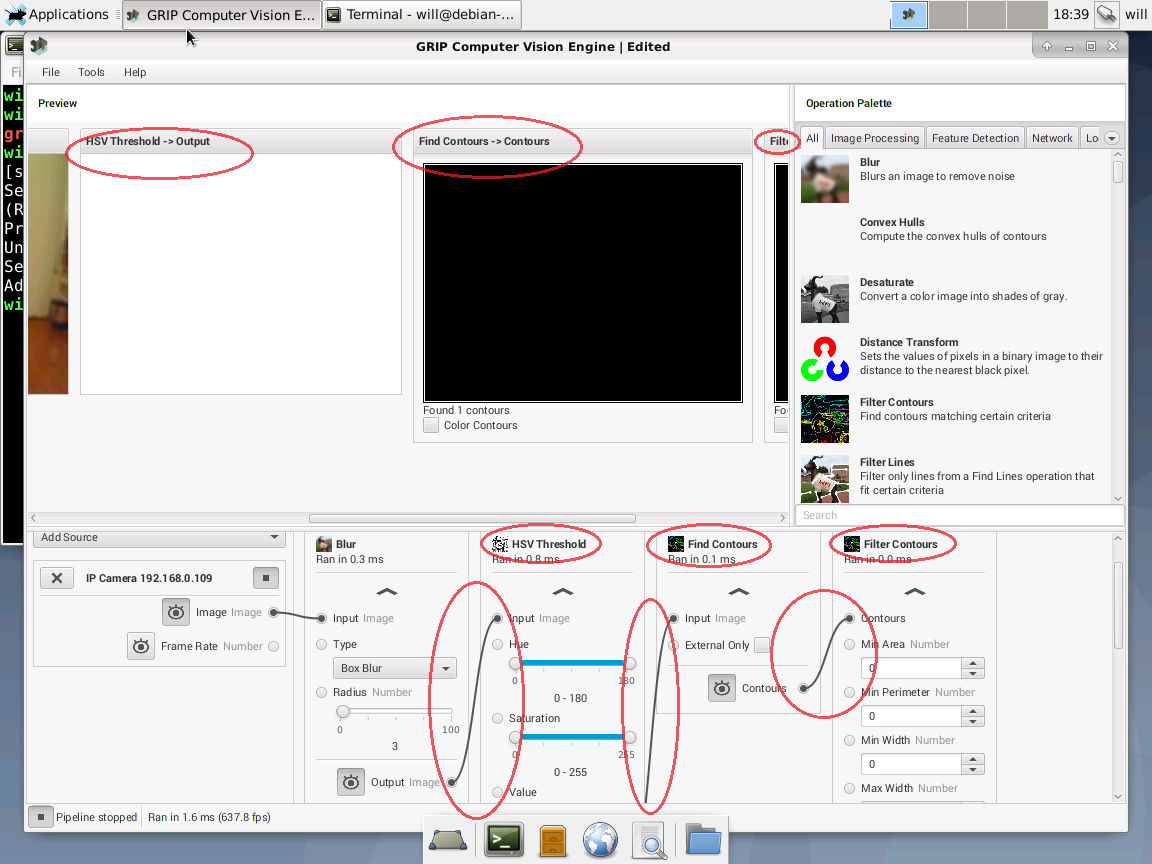
Click the other “open eye” icons to show (or hide) previews for the image in each step of the pipeline. You may need to scroll left and right to various filters if they do not all fit on screen at once. You may also choose to hide the preview images if you are satisified with the output of that filter and do not need to look at it.
The only preview that really matters is the final one as that is the end result of the pipeline.
This is an image processing pipeline. The raw camera input is all the way on the left, and the final result is all the way on the right. Data “flows” down the pipe from left to right.
Adjust HSV Filter
I am using the HSV filter as one possible way to try to distinguish the tennis ball. You may find that RGB, HSL, or some other filter works better for you. Try different filters to see what works best, or consult someone who knows a lot about colors and the science behind them to help figure out which filters work best.
By changing the values of hue, saturation, and value (intensity/brightness) we can (through trial and error) filter out the image so only the tennis ball is white.
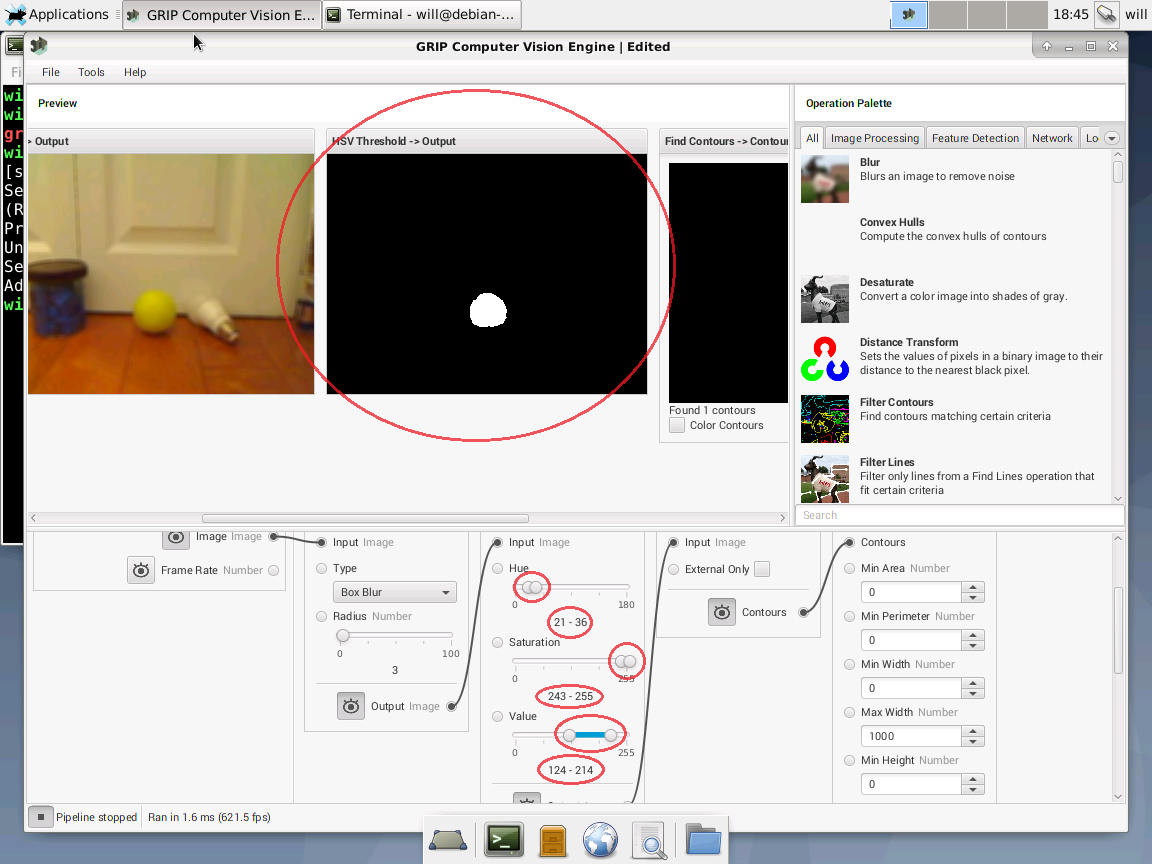
This looks great. The other objects are filtered out and I found settings that work well for my object.
The values for hue, saturation, and value, work well for this object in this lighting with this camera, but will need to be altered for your situation.
Adjust Filter Contours Filter
The output of Find Contours does not need to be adjusted, but it
is informative. In my case, the HSV Filter was well
adjusted and so the Find Contours filter showed only
one contour (outline). Overall, that is ideal. In that situation
GRIP is not confusing the tennis ball with another object on
screen.
Do not actually do this, but for the sake of example, I made my HSV filter worse to better illustrate how we might filter contours when multiple are found.
Here I made the HSV filter worse and now my pipeline is confused. It’s finding ~15 contours and doesn’t know which one I want.
Using the Filer Contours filter we can reliably get
to 1 contour.
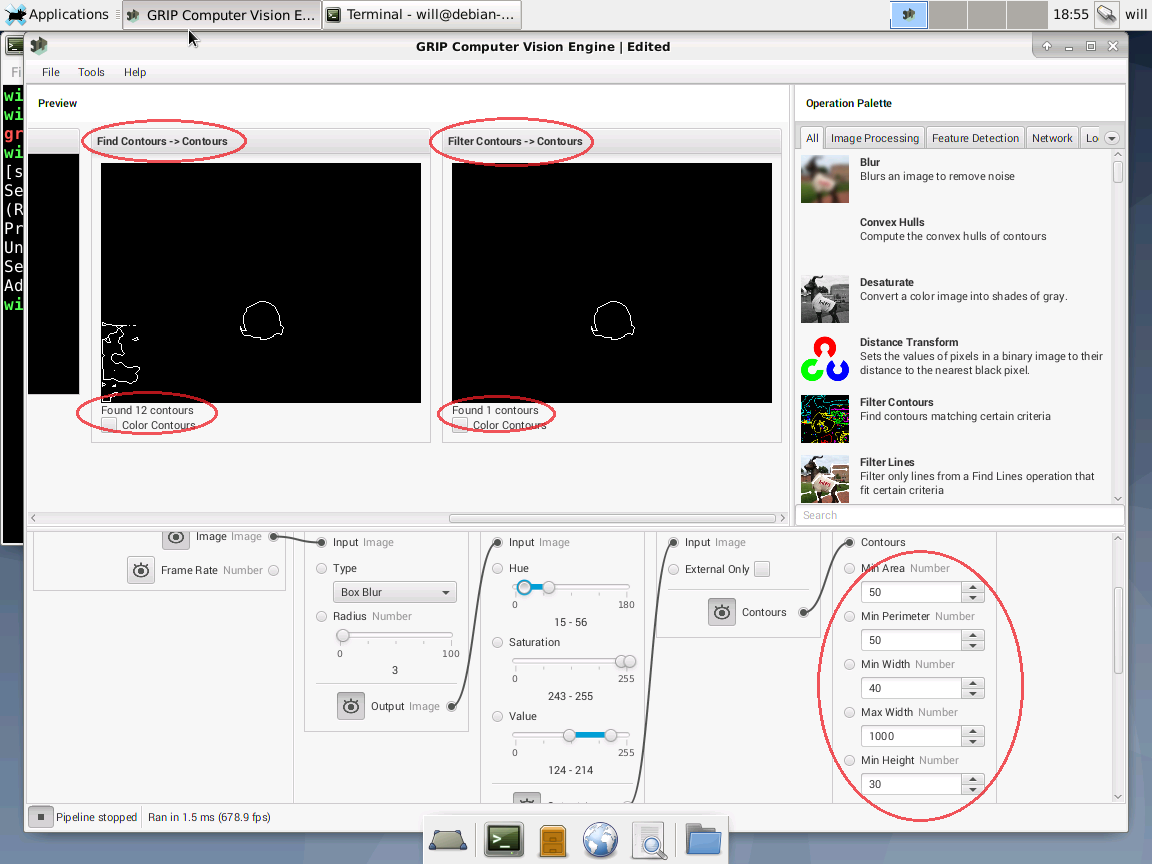
The camera image is 320x240 pixels large. By changing the filter contours options I can specify a minimum size, area, and perimeter of a contour to help GRIP understand which contour it should detect.
Ideally, the earlier filters do the work needed. If an earlier
filter can be more precise, it should be made more precise. You
want as few contours as possible in Find Contours,
but Filter Contours is a good pipeline stage to help
clean up any noise.
Try moving the object to verify that the contour matches wherever the ball is.
This is a poor quality example. My office is poorly lit, the test computer is slow, and I am moving the ball with my hand. In reality, an FRC game object is larger, the lighting is better, and the robot moves to the object. That said, it is working (more or less).
Save the Project
Once we are satisfied with the pipeline click
File -> Save so that you can open the
pipeline later and adjust it if needed.
Generate Code
Click Tools -> Generate Code to
generate application code. This application code is taking
everything in GRIP and turning it into a file that can be used in
a program.
GRIP just did us a huge favor. It took our pipeline and all the settings to identify our specific object and generated code that we can plug in to a vision application! It basically wrote the code for us.
GRIP can generate code in multiple languages. For this example, I
am using Java as the language and checking the
Implement WPILib VisionPipeline box. Once that file
is saved it can be used for a vision tracking application.
At this point we can close GRIP.
Now What?
The code generated by GRIP can be used directly by a robot or by an image co-processor (like a Raspberry Pi) to help tell a robot where to move, how to shoot/use a mechanism, or otherwise what to do when it “sees” an object. But that process is not covered here.
Using GRIP is only one step of a larger series of steps for vision programming. See the Vision with WPILibPi FRC guide for a broader explanation.