DIY Bicycle Camera with Phone
How?
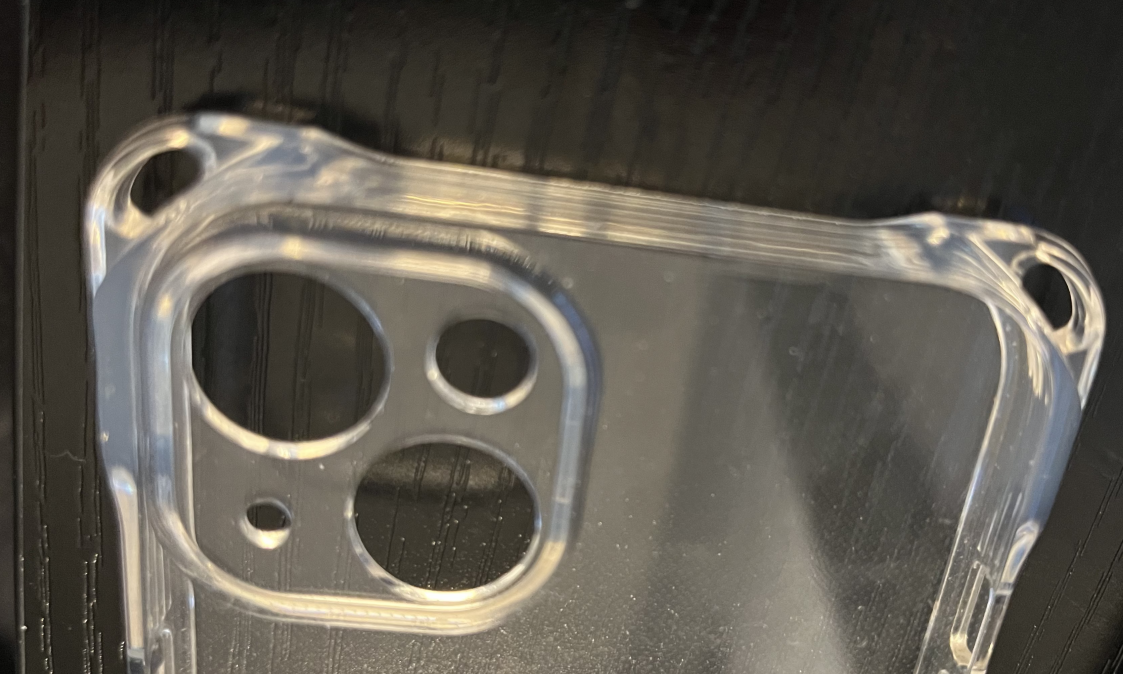
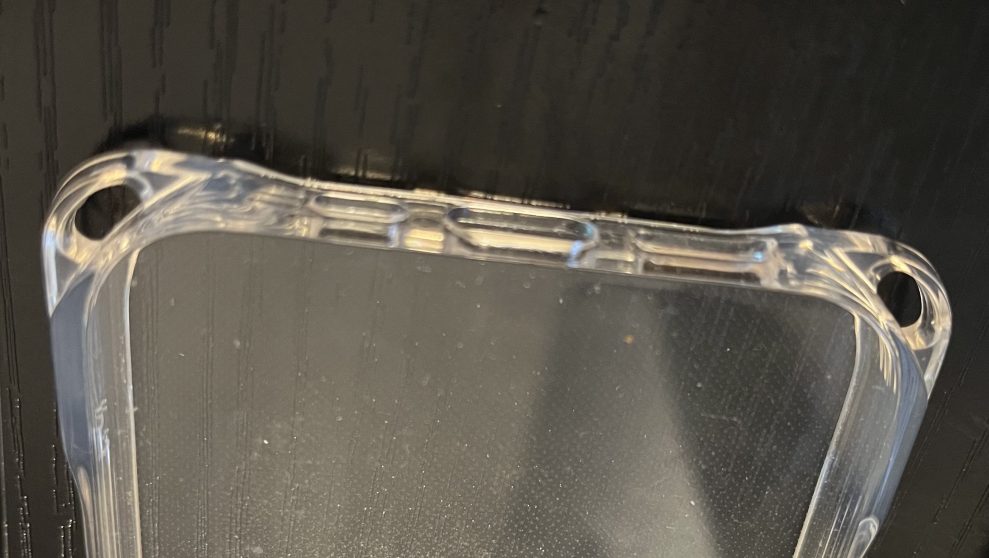
The crux of my mounting setup is the Wuwedo for iPhone 13 Crystal Clear Case with Detachable Adjustable Crossbody Strap. The crucial design feature of this phone case is that it has an attachment loop at all four corners. This is critical as it means the phone will be secure and not bounce when out riding.
I opted to buy a case off the shelf that has multiple attachment points, but someone clever could fashion their own.
The phone case comes with a sturdy nylon strap that attaches with D-hook metal sliding clasps to the attachment points. This strap is strong and serves well as the neck-strap so the phone never falls off while riding.
One can then purchase some string or paracord or other elastic material for a waist strap. The waist strap is more convenient if it has a buckle or some kind of lobster claw snap clasp to easily and quickly connect or remove the waist strap. Although a waist belt strap may seem unnecessary I find it goes a long way to help stabilize the video.

Attaching the straps so that the camera lenses are as high as possible is most helpful for getting a better viewing angle when recording.
Having lots of available phone storage is helpful and a wide angle lens camera is helpful too. Adjust recording settings as needed to optimize for storage needs and ideal conditions. Although a case like this could allow recording in either a horizontal (landscape) or vertical (portrait) orientation, landscape is ideal for capturing meaningful context when cycling.
Why?
I like to record video and audio when I’m out biking. The term “bike cammer” may apply to me. Motorists, police, and media are quick to blame cyclists when a crash or collision occurs; especially when a driver is involved. Having a camera gives me peace of mind and some insurance that I can prove my side of the story if I was ever involved in a crash when bike riding. My normal bike camera setup is one camera mounted to my handlebars like a “dashcam” and another mounted to my seatpost to record behind me.
There are some occasions when I am unable to bring my bike-mounted cameras with me or it does not make sense to use my normal bike cameras. This can happen when traveling, borrowing a rental bike, or when my destination prohibits certain recording equipment.
When going to football, baseball, basketball, or other sports games cameras are often banned. Some music concerts also ban recording equipment. Security and venue protocols may ban cameras or similar recording equipment. This is the primary use case for my DIY phone chest mount. Rather than risk having security tell me, “no cameras”, and needing to try and hide my bike cameras somewhere or leave them on my bike, I can easily bring my phone in.
This DIY bike camera rig harness is similar to what one might get with a GoPro and their “chesty” mount. It offers hands-free action-camera style recording. If a destination disallows GoPros and similar cameras this mount or something similar may be preferred. Any modern venue would allow a person to bring in their phone, and the materials for this case are inoccuous and shouldn’t pose any issues. The straps can even be used as basic shoulder straps when not biking so the phone can be worn like a standard crossbody phone strap.